Showing posts with label Gluten Free Recipes. Show all posts

Tuesday, October 11, 2016

TOS Review~ MyFreezEasy.com Freezer Meal Plan Membership


Recently, my busy family was given a chance to try out a new freezer meal plan from MyFreezEasy.com.  For this review, I was given access to the MyFreezeEasy.com Freezer Meal Plan Membership. If your family is like most families now a days, the freezer meal plan from MyFreezEasy.com will be a life saver!


MyFreezEasy.com Freezer Meal Plan Membership {MyFreezEasy}
So What is MyFreezEasy.com?

MyFreezEasy.com is a freezer meal planning tool that allows you to make 10 (or more) meals to store away in your freezer for those busy days! You can prepare and load your freezer up with meals in LESS than an hour. Having healthy, yummy meals ready for my family to eat is such a huge help when running around. 
This year, the kids have co-op classes, clubs, scouts, and sports. We are out and about 3-4 days a week. We are always walking in the door at dinner time. Having dinners ready to go are a huge help for this hectic mom! Not only do I have great meals for my family to eat, I'm saving money too. I'm no longer running to the store to pick up something for dinner because I forgot to take something out the night before or that morning. No more last minute trips to the grocery store.


MyFreezEasy.com offers freezer meals that will appeal to everyone in your house. Even those moms with picky eaters will find options for their families. 


MyFreezEasy.com Freezer Meal Plan Membership {MyFreezEasy}

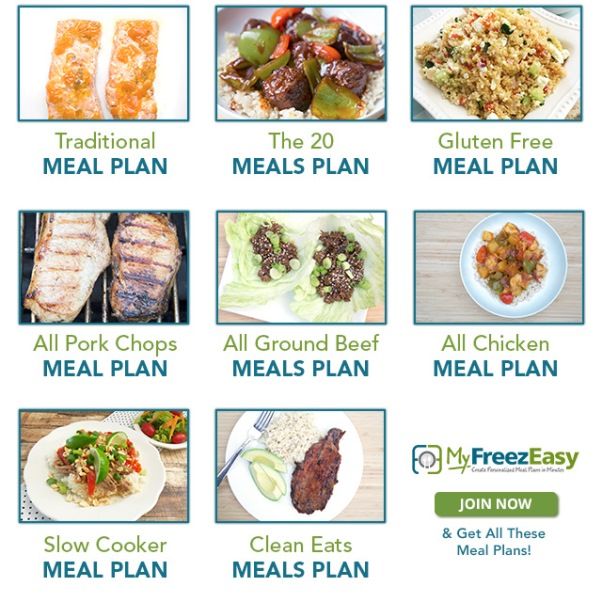
My daughter and I have Celiacs Disease, so I was very excited to see a Gluten Free Meal Plan offered. We gave this freezer meal plan a try. I did have to change it up a little bit to fit our families likes and dislikes.
We were away for September, so we tried out the October freezer meal plan. 

Our October freezer menu plan included...

Upside Down Nacho Skillet
Chicken Curry Peanut Soup (this was a no go in our house)
Baked Island Chicken
Slow Cooker Simple Beef Stew
Split Pea Soup (with 2 people who highly dislike peas this was also a no-go)

Each meal plan includes Recipes for the dishes, shopping lists for your meals, prep assembly instructions, meal assembly instructions, cooking instructions, and labels you can print on stickers to place on your freezer meal containers. No guessing what's in the bag. Each month comes with 5 recipes. To get the 10 meals for your freezer, you double up each recipe.


The first recipe we decided to give a try was the Upside Down Nacho Skillet. I figured you can't go wrong with nachos and tacos! The only substitute I made for with this recipe was changing out turkey burger for the ground beef. It still tasted great. It was a big hit for our family.

I prepared the Baked Island Chicken and the Slow Cooker Simple Beef Stew for the freezer. We haven't eaten it yet, but it was easy to prepare. I love how the assembly prep instructions included the directions for preparing 2 meals. It's nice knowing that I have meals waiting in my freezer. I feel  more organized and on top of things. I no longer feel overwhelmed with what to prepare for dinner.

We did try out a few of the other recipes. The Bacon and Ranch Chicken was a big hit with the kids. We had everything we needed already in the house....chicken, ranch dressing, bacon, and cheese. The dish was easy to assemble, took about 45 minutes to bake, and had wonderful flavor. The only thing I would change is the bacon. My family prefers their bacon crispier. I think the next time I make it, I cook the bacon first and then sprinkle it on top.
Between the gluten free meal plan and the clean eats meal plan, I know I will be able to prepare meals for my families. 

So What Did I Think of MyFreezEasy.com?

I found the meal plans easy to follow. Erin has thought of everything. Being able to print off my shopping list and head right to the store is great. The selection of meals offered are wonderful. The variety of meals is amazing. Every family will be able to find meals to fit their tastes. 
Being able to build my own recipe meal plan is a wonderful tool. I can adapt the meals offered to my on family. I love how I can save them to my own file and then print them out to head to the store.
My only recommendation is to have a dessert added to the monthly meal plan. It would be great to have desserts prepared for when last minute quests arrive for a visit.
The MyFreezEasy.com is great for homeschooling moms, stay at home moms with little ones, and working moms. It's great for everyone one who want easy dinners ready to go, wants to cut down their time in the kitchen, wants to save money on groceries, and most importantly prepare healthy tasty meals o eat! 

For this review, I received the Premium Annual Membership for this review. 
This freezer meal plan costs $95 a year. 
So what did I get?
2 months free access
Access to 8 new meal plans
Video instructions for assembly
Highlight videos for all meal plans
Ability to adjust serving sizes
Create my own meal plan
Customize Existing Meal Plans
and 
Create a favorites section for recipes

Learn more about MyFreezEasy on......

Be sure to stop by and visit the other members of the crew to see the recipes that they decided to give a try!


MyFreezEasy.com Freezer Meal Plan Membership {MyFreezEasy}


 photo logo3.png


 Please Note~ This post may contain affiliate links. If you choose to click on a link, add it to your cart and complete your purchase, I will receive a small percentage. We are very grateful for this additional source of income. Thank you. 

 Make sure you don't miss a thing! Subscribe to Mountain of Grace Homeschooling below and get the post delivered directly to your inbox!


Enter your email address:


Delivered by FeedBurner
Crew Disclaimer

Wednesday, July 8, 2015

Gluten Free Lemon Pound Cake

For Fourth of July, I made a gluten free lemon pound cake. It was yummy!  


Ingredients
1 package of gluten free yellow cake ( I used Hodgson Mills)
1 package (3.4 oz) of Jell-O lemon instant pudding mix
4 large eggs
1 cup butter (2 sticks)
2/3 cups water

Directions
Preheat oven to 350 degrees.
Mix together cake mix, pudding package, eggs, butter, and water.
Mix until lumps are gone.
Pour batter into a prepared bundt pan or any pan of your choice. I just used butter to grease my pan.
Bake for 40 minutes or until golden brown. Test with a toothpick to check if cake is done.

We served it with powered sugar, strawberries, and blueberries.

Simple and easy to make, but tastes great!
         
                                        photo 19dbef6b-9cdb-4ef9-a1fc-d1f09c1d51b7.png

Join in on the fun!


Enter your email address:


Delivered by FeedBurner

Tuesday, March 24, 2015

Gluten Free Cinnamon Sugar Doughnut Holes


I decided to make some gluten free doughnuts for my daughter when she was sick with a cold last week. They were easy and tasted pretty close to the real thing.
I found the recipe on the Betty Crocker  website, but I change a few ingredients because we just didn't have all of them.

So here is my recipe......


Ingredients

Vegetable Oil for frying the doughnuts
1/4 cup sugar
1/2 teaspoon cinnamon
2 1/2 cups Bisquick Gluten Free mix (whole box)
1/2 cup brown sugar
1/2 teaspoon ground nutmeg
4 Tablespoons butter, melted
2/3 cup milk
2 egg, beaten


Directions

In a saucepan, heat 3 inches of oil. You can use a deep fryer if you have one.

In a small bowl mix the sugar and cinnamon together. Set aside for later.

In a large bowl, combine the bisquick, sugar, and nutmeg together. Add the melted butter, milk, and eggs. Mix the ingredients until smooth. 

Shape the dough into small balls. Carefully drop the balls into the hot oil. Be careful not to overcrowd the pan. Fry for 2 minutes or until golden brown. 

Drain the balls on a paper towel. While still warm, roll the balls into the cinnamon/sugar mix. 

YUMMY!!!!


Till next time,
~Monique


Enter your email address:


Delivered by FeedBurner

Tuesday, March 17, 2015

What's for dinner this Friday? Shrimp Scampi

Last Friday, I decided to make Lego Man one of his favorite dishes....Shrimp Scampi. He loves getting it for dinner at an Italian restaurant near my mom's house. So I searched online and found an easy recipe online. I found it on Simply Recipes. Of course, I had to change it up a little to fit our needs.


Ingredients

1 pound of shrimp...I used frozen and just thawed it overnight
2 Tablespoons of olive oil
2 Tablespoons of butter
Salt and Pepper to taste
1 Tablespoon garlic, minced
1/4 teaspoon red pepper flakes
1/2 cup white wine
1 Tablespoon lemon juice
Parsley


Directions

Place butter and olive oil in saute pan. Mix the butter and oil together on high heat. Add garlic and red pepper flakes. Saute the garlic until it is slightly browned. 

Add shrimp. Add the wine and stir to coat the shrimp in the butter wine sauce. Make sure the shrimp are in a single layer. Bring sauce to a boil.  Boil the shrimp and wine for about 2-3 minutes. 
Flip the shrimp to cook the other side. Cook on high for 2 minutes.

Remove the pan from the heat and sprinkle the shrimp with parsley, lemon juice, and black pepper. Stir to mix the ingredients.

Serve on rice or pasta. 
We used gluten free pasta and it was delicious!


Till next time, 
~Monique


Enter your email address:


Delivered by FeedBurner

Tuesday, January 20, 2015

Gluten Free Coconut Raspberry Bars

Last night, I made this yummy dessert for my family. The original recipe I found at Deliciously Organic. I modified the recipe to fit our needs. It's still grain free, but not Paleo!


Ingredients

Crust
1 1/2 cups almond meal flour
1/2 teaspoon baking soda
1/4 teaspoon salt
1/4 cup organic butter, melted
1 tablespoon honey
1 teaspoon vanilla extract
1 tablespoon coconut flour

Filling
Half a jar of Trappist Monks Red Raspberry Jam

Topping
3 tablespoon organic butter, melted
1 teaspoon honey
1/4 cup dark brown sugar
3/4 cup almond meal flour
1/2 shredded coconut (I used unsweetened, but you could use sweetened)


Preheat the oven to 325 degrees Fahrenheit. Line a 9 x 9 pan with parchment paper.
Mix the almond flour, baking soda, and salt together in a bowl. In a small bowl, mix the melted butter, honey, and vanilla extract together. Pour the butter mixture into the flour mixture. Mix. Dough will be crumbly, but moist. Press the dough into the pan.


Bake for 6-7 minutes.
While the dough is baking, prepare the topping. Mix melted butter and honey together in a small bowl. Mix almond flour and coconut together. Pour the butter into the flour mixture.


Take pan out of oven. Spread the jam over crust.


Top the jam with the topping crumble.


Bake for 20 minutes.
Take out of the oven and cool completely.
Cut into bars...they will be a little crumbly, but oh so good!


Till next time,
~Monique

Linking up with Try a New Recipe Tuesday


Enter your email address:


Delivered by FeedBurner

Tuesday, January 13, 2015

Gluten Free Fluffy Pancakes....YUM!

For the past two years now, I have been trying to find a gluten free pancake recipe that would pass the kids approval. We finally got it! We got a little help from Pamela's Pancake Mix but we altered the recipe to fit our taste and it is yummy! It passes the kid test!


It even works for waffles too.

Ingredients
2 cups of
Pamela's Ultimate Baking and Pancake Mix, 4-Pound Bags (Pack of 3)
2 large eggs
1 1/2 cups milk
2 Tablespoons of butter, melted

Mix all the ingredients together and make like normal! We use a cast iron griddle. If you're using a regular pan, you may need to grease the pan.
Super easy.

You can all types of yummy stuff to them....blueberries, chocolate chips, apples, etc.


Till next time, 
~Monique


Enter your email address:


Delivered by FeedBurner

Tuesday, April 1, 2014

Gluten Free Grasshopper Pie


For St. Patrick's Day, we have a special dessert.
Gluten Free Grasshopper Pie.

I took a regular grasshopper pie recipe and modified it so that Princess P and myself could eat it too.


Ingredients
2 cups crumbled gluten free chocolate cookies (gluten free oreos)
3 cups of mini marshmallows
1/2 cup of milk
1 1/2 cups whipping cream
1 teaspoon of mint extract
1-2 drops of green food dye
chocolate shavings
chocolate coin


Instructions
Remove the icing from the cookies. Crumble the chocolate cookies.
In a pot, melt the marshmallows with the milk over low heat. When the marshmallows are all melted, chill the mixture. Stir it occasionally until the mixtures sets.
Once the marshmallow mixture has cooled and set, stir in the mint extract and green food dye. 
Set aside.
Using a mixer, whip the whipping cream until soft peaks form. Fold the whipping cream into the marshmallow mixture. Leave a little bit for topping the treats.
Set aside for later.
Take your cookie crumbs and press firmly into the bottom of small glasses. 
Add the green marshmallow mixture onto the cookie crumbs.
Top each cup with a dollop of whipped cream.
Sprinkle semi-sweet chocolate shavings onto the whipped cream.
Place a chocolate coin into the whipped cream.


Chill for at least 2 hours.
Store in the fridge until ready to eat.
They can be made a day before.

Wednesday, March 12, 2014

Gluten Free Banana Streusel Muffins

Last week we bought bananas at the store. The kids ate a few of them but suddenly stopped eating them. I reminded the kids about the bananas and they informed me they were letting them go bad so I would make banana muffins. So a few days passed and the bananas were ready for use. I had 4 bananas ready to go. Since adding Princess P to the gluten free diet, I have been experimenting more with the gluten free flours we have.
I took two recipes, my grandmother's banana bread recipe and a streusel banana nut muffin recipe. I worked with both recipes and gluten free flour to create a new gluten free banana muffin recipe.


The muffins were a hit. They are moist and have tons of banana taste.

Ingredients
Muffins
2 cups gluten free flour ( I bought mine at Costco)
1 cup sugar
2 teaspoons baking powder
1 teaspoon cinnamon
1/2 teaspoon sea salt
4 ripe medium bananas
3/4 cup milk
3 tablespoons of butter, melted
1/2 teaspoon pure vanilla extract
1 large egg

Streusel
6 tablespoons of gluten free oats
5 tablespoons of gluten free flour
2 tablespoons of brown sugar
2 tablespoons butter, melted
1/4 teaspoon cinnamon


Preheat your oven to 350 degrees.
Prepare your muffin pans. I use butter to grease mine. You can use cupcake liners.
In a large bowl combine the gluten free flour, sugar, baking soda, cinnamon, and sea salt. Make a well in the dry ingredients.
In a separate bowl, combine the milk, bananas, butter, vanilla, and egg. Pour the banana mixture into the well. Stir the ingredients together until well blended.

To make the streusel, combine the oats, flour, brown sugar, and cinnamon. Add the butter and blend with a fork until it's a crumbly mixture. Sprinkle the mixture onto the prepared muffins.

Bake in the oven for 25 to 30 minutes. Let cool and enjoy. These are very moist and soft when you eat them. They are not dry or crumbly!





Tuesday, December 17, 2013

Gluten Free Mexican Wedding Balls

To celebrate the feast day of Our Lady of Guadalupe this year, we made two batches of Mexican Wedding Balls. The second batch we made were gluten free so that Princess P could eat them!.


These were super easy to make, since you use gluten free Bisquick. I found the original recipe at Betty Crocker, but after reading the reviews I added more butter to give the cookies more moisture. A lot of people complained that the original recipe made cookies that were too crumbly.

Ingredients
1 1/4 cup butter, softened (next time I am going to try 1 1/2 cups butter to give more moisture)
1/2 cup powdered sugar
1 teaspoon of pure vanilla extract
1 egg
2 1/4 cups Bisquick Gluten Free mix
3/4 cups chopped pecans
Powdered sugar to roll cookies in

Directions
Preheat oven to 400 degrees.
In a large bowl, cream together the butter and powdered sugar until it is soft and fluffy. Add the vanilla and egg. Mix well.
Mix Bisquick mix and salt together. Gradually add the flour mixture to the butter mixture. 
Fold in nuts.
Shape dough into 1 inch balls. Place them on parchment paper.
Bake for 7-9 minutes.
Remove cookies and cool. 
While cookies are still warm, roll GENTLY into powdered sugar. Cool and roll in sugar again.

I allowed the cookies to cool for about 10-15. I found the longer they sat, the less likely they were to crumble.

Yummy! Yummy! Yummy!


Linking with.... 


Wednesday, December 11, 2013

Gluten Free Chocolate Truffles

Today, I am sharing a recipe for gluten free chocolate truffles that we made on the feast of Saint Nicholas.


I found the original recipe over at Gluten Free on a Shoestring Budget. I changed it a little because some things we didn't have on hand.

Ingredients
4 tablespoons Butter, salted
4 ounces unsweetened chocolate, chopped
1/4 teaspoon sea salt
1 teaspoon pure vanilla extract
5 cups confectioner's sugar
1/4 cup heavy cream*
Sprinkle, Chocolate chips, and Nuts for decorating

*We didn't have heavy cream so I made a substitute for it.
3/4 cup milk
1/3 cup butter
Melt the butter. Pour butter slowly into milk and stir.


Place the butter and chocolate in a small pan. Melt it over a pan of simmering water. Stir occasionally until all the chocolate and butter is melted. Remove pan from heat and add the salt and vanilla.
Place 4 cups of powdered sugar into a bowl and add the melted butter/chocolate mixture. Mix slowly. Mixture will become crumbly, but will stick together when pressed. Add the cream. The mixture will become rather moist. Add the last cup of powdered sugar, a little at a time. Kneed the mixture together until the dough is smooth. It should be soft.
Roll the dough into balls.


Place balls on a piece of parchment paper. Brush the balls with some water and roll them into your sprinkles, nuts, etc. Leave some plan too!


 We used sprinkles, nonpareils, walnuts, and mini chocolate chips.


 Place the truffles in the fridge for 1-2 hours. Take out and Enjoy!!


Linking with.... 

Tuesday, November 26, 2013

Gluten Free Thin Mints

Recently, Princess P and I made Paleo Thin Mints inspired by the Girl Scout Thin Mint cookies. I found the recipe over at Elana's Pantry. If you have never checked out her site, stop by and see all the amazing food she has created! She has a wonderful selection of Paleo and Gluten free recipes. Everyone we have tried has been yummy!


Ingredients

1 cup blanched almond flour
1 teaspoon coconut flour
2 tablespoons cocoa powder
1/8 teaspoon sea salt
1/4 baking soda
2 tablespoon butter, melted
1/4 cup honey
1 teaspoon mint extract (original recipe called for peppermint, but we had mint in the house)
1 package of dark chocolate chips
1/ teaspoon mint extract

Directions

In a food processor, combine the almond flour, coconut flour, cocoa powder, salt, and baking soda.
Pulse the butter, honey, and mint extract until a dough ball forms.
Roll out the dough between two sheets of parchment paper, about 1/8 inch thick.
Freeze dough for 15 minutes. Remove from freezer and cut out cookie shapes. Use a small cookie cutter, about 2 inches for best results.
Transfer the cookies to a parchment lined cookie sheet. Bake for 4 minutes at 350 degrees.
Remove cookies and cool completely.


Place cookies into the freezer for about 1 hour. Remove from freezer to dip in chocolate!


Melt chocolate chips and mint extract in a small sauce pan over low heat. It doesn't take long to melt the chocolate.


Dip each cookie into the chocolate. Place cookie onto parchment paper and freeze for another hour.


Serve and Enjoy!
,
Store cookies in the fridge for a crispy cookie!


Linking with.... 

Monday, November 11, 2013

Gluten Free Apple Crisp

This past weekend, Princess P and I made a gluten free apple crisp for dessert.


Apple Filling
4 large apples (crisp/tart apples work well)
1 tablespoon coconut palm sugar
1 tablespoon lemon juice
1/4 cup water
1/2 cup of pecans
1 tablespoon arrowroot powder (or cornstarch)

Crumb Topping
1 cup of almond flour
1/4 teaspoon sea salt
1 teaspoon cinnamon
1 tablespoon vanilla extract
1 tablespoon coconut oil (melted)
2 tablespoons coconut palm sugar

Preheat oven to 350 degrees.
Peel, core, and cut apples into bite size chunks.
In a bowl, combine apples coconut sugar, and lemon juice. Toss until apples are well coated. In a small bowl, combine arrowroot powder and water together. Pour over apples and coat well.
Place apple mixture into a baking dish, I used an 8 x 8 dish.
In a separate bowl, combine the almond flour, sea salt, cinnamon and coconut sugar. In a small bowl, melt the coconut oil. Add vanilla.
Stir the wet ingredients into the dry ingredients to make a crumb mixture.
Sprinkle topping over the apples. Top with a few more pecans.
Bake for 45 minutes or until your apples are soft and the topping is a golden brown.

Linking with.... 
Better Mom MondaysDomestically Divine Tuesday, and Kids and a Mom in the Kitchen

Tuesday, June 25, 2013

Georgia Cookie Candy


While studying the state of Georgia, I came  across a recipe for Georgia Cookie Candy from Paula Deen.
We finally  got around to making them!
Well, I guess I should say Princess P made them.
I collected all the ingredients and set them on the table to start and she informed me she wanted to do it herself! I can read the directions and I don't need any help.
This is a wonderful recipe for kids to make since it doesn't require the use of a stove.


Ingredients
1 cup butter, 2 sticks, softened
1 cup of crunchy peanut butter (you can use creamy)
3 cups confectioner's sugar
1 1/2 cups semisweet chocolate chip

Directions
Line a 13X9 pan with foil.
Mix the peanut butter, butter, and powdered sugar. Mix until a ball forms. Press the peanut butter mixture into the pan. Smooth out until it looks nice.
Melt the chocolate chips in the microwave for about 1 minute. Remove and stir until creamy.
Spread evenly over the peanut butter cookie layer.
Chill for several hours.

When ready to serve, allow the candy to come to room temp and cut into pieces.

Eat and Enjoy!!!

Tastes yummy!


Linking with.... 


Tuesday, June 18, 2013

Perfect Paleo Blueberry Muffins

Following a gluten free diet isn't always easy for the family. Often, recipes we find and try don't end being very appealing. I came across a blueberry muffin recipe and tweaked it a little for what we had on hand in the house.
Princess P helped make the muffins and everyone was pleased with how they turned out!


Ingredients

2 cups almond butter
2 cups almond flour or almond meal
6 large eggs, lightly beaten
1 cup honey
1/2 cup shredded coconut
2/3 cup coconut oil, melted
1 teaspoon baking soda
1 teaspoon baking powder
1/2 teaspoon sea salt
1/2 teaspoon cinnamon
1 1/2 cups blueberries~ I used organic frozen blueberries

Directions

Preheat the oven to 350 degrees.
Mix the almond flour, baking soda, baking powder, sea salt, coconut flakes and cinnamon together in a bowl.
Mix the almond butter, honey, eggs, and coconut oil together.
Add the wet ingredients to the dry ingredients.
Mix well.
Gently fold in the blueberries.
Spoon the batter into prepared muffin tin. I used paper liners.
Bake for 15-20 minutes.
Muffins should be a golden.
Cool and Enjoy!

Makes about 18 muffins.


They don't last long!


Linking with.... 


Friday, February 22, 2013

Gluten Free Peanut Butter Blossoms


Ingredients

2 cups Peanut Butter

1 cup light brown sugar

2 eggs

2 1/2 tsp baking soda

Hershey Kisses(optional)

Directions

Preheat oven to 350 degrees.

Cream the peanut butter and brown sugar together. Add eggs and baking soda. Mix well. Roll cookie dough into 1 inch balls and place onto a greased or non stick cookie sheet.

Flatten with your hand.

Bake for 8 minutes or almost done. Take out of oven and place Hershey kiss into the center of the cookie. PLace cookies back into the oven to allow the kisses to melt slightly. I just keep an eye on them and pull them out when the kiss looks soft.

Makes 4 dozen cookies...3 dozen if your kids help make them.

To make the traditional criss cross peanut butter cookie..flatten cookie dough and then use a fork to make the pattern on them.


Linking up with 

Instagram